Many users have reported seeing the Audio renderer error while watching a YouTube video on their PC. This problem has been reported in several major browsers on Windows 10 and Windows 11, including Chrome, Firefox, and Edge. The cause of this issue is unknown; however, if you are experiencing it, it might be due to competing audio drivers, clashing sound and ASIO drivers, etc. This article will guide you through troubleshooting the ‘Audio Renderer Error’ on YouTube on Windows.
How To Fix Guide On YouTube Audio Renderer Error?
In this article, we’ll look at how to fix YouTube Audio Renderer Error on Windows.
Reconnect Audio Device
If you are accessing YouTube with an external audio device, you should reconnect your audio device. For example, a malfunctioning headphone jack or cable may cause the YouTube Audio renderer error on Windows. Reconnecting the external audio device may fix any issue, and you should no longer get the ‘YouTube Audio Renderer Error’ on Windows.
Restart PC
This issue may occur as a result of transitory issues on your PC. Restarting your PC will likely help resolve the issue. For example, if you face YouTube Audio Renderer Error on Windows, restart your computer, and you will be OK.
Run Audio Troubleshooter
Running the Audio troubleshooter is another technique to fix YouTube Audio Renderer Error on Windows. Running Audio Troubleshooters can help you solve the issue you’re facing. Follow the instructions below to do this.
1 – Open the Settings app on your PC using the Windows + I key combination.
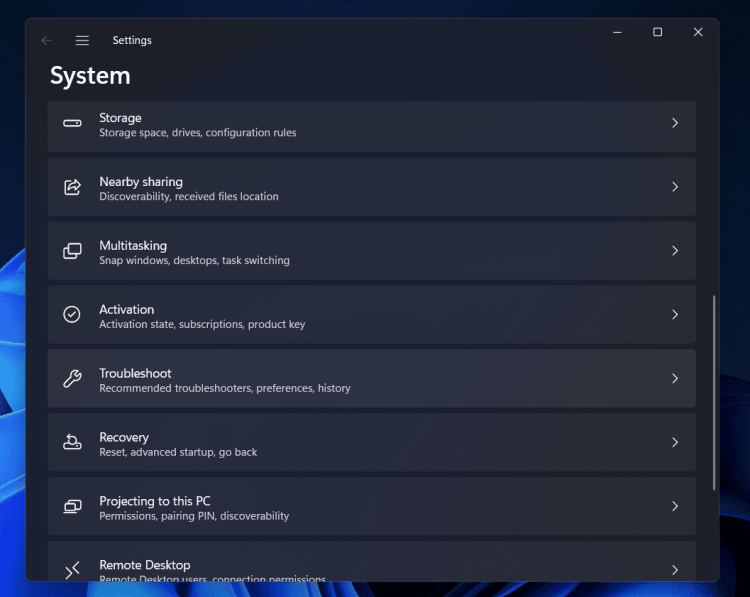
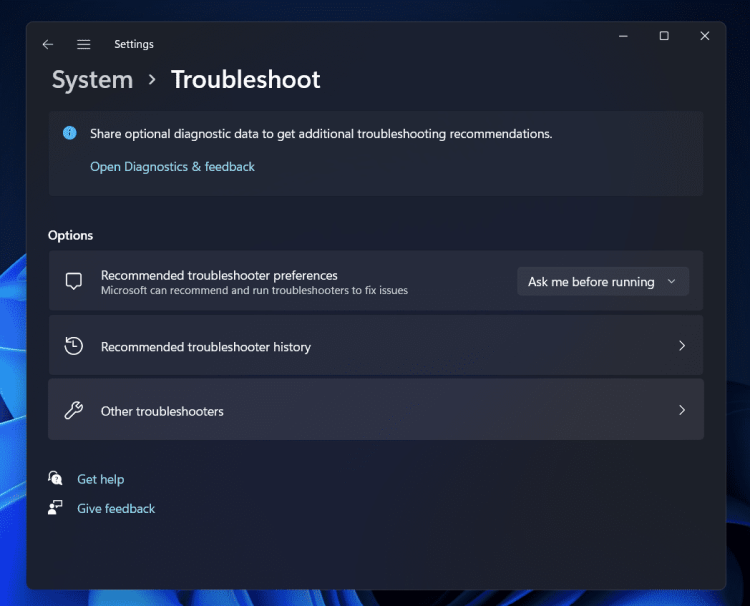
2 – In the Settings app’s System tab, click the Troubleshoot option.
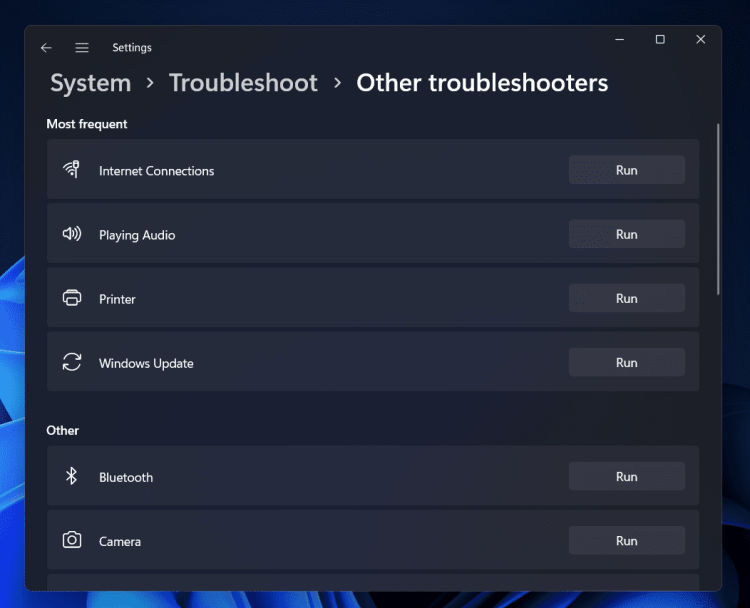
3 – Navigate to the Troubleshooters area.
4 – To run the Audio Troubleshooter, click the Run button next to the Playing Audio.
5 – Choose the audio device you face the problem with, then click Next.
6 – Select the option Yes, Open Audio Enhancements.
7 – You will receive a repair plan if the troubleshooter discovers an issue. The issue will be fixed if you follow the on-screen instructions.
Re-Enable Audio Device
To fix the YouTube Audio Renderer Error on Windows 11, try to disable and then re-enable the Audio device. You may do this by using the Device Manager. To fix the issue you are facing, follow the steps listed below.
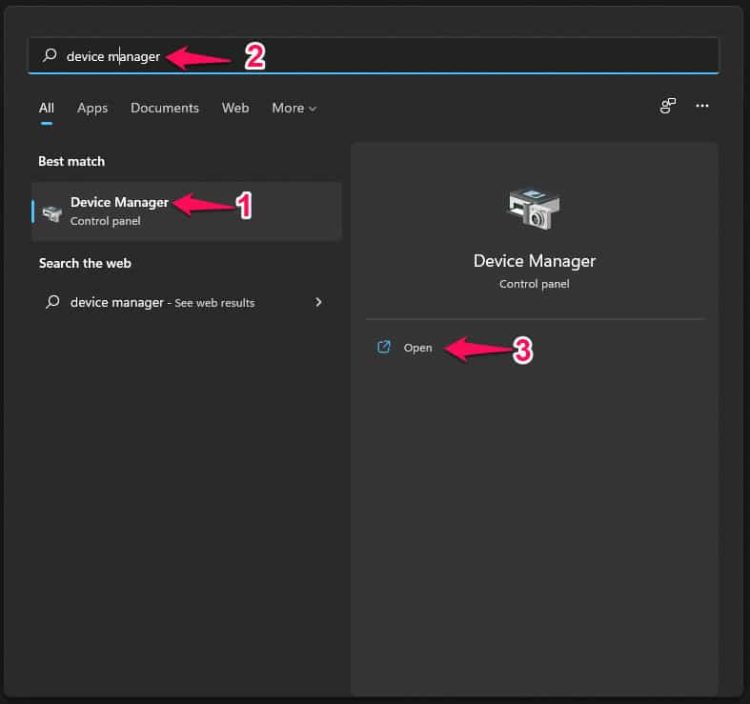
1 – To open the Start Menu, press the Windows key on the keyboard.
2 – In the Start Menu, type Device Manager. Then, to open the Device Manager, click the correct search result.
3 – Double-click the Sound, Video, and Game Controllers option in the Device Manager to expand it.
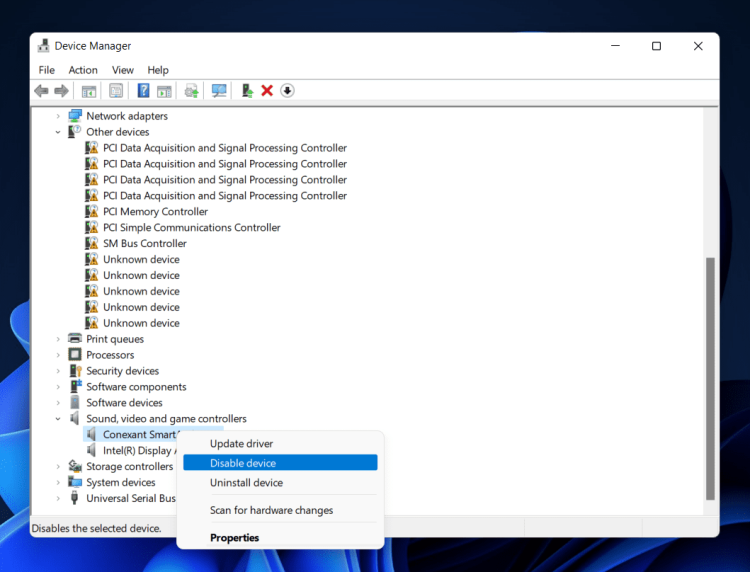
4 – Right-click the audio device and choose the Disable device option to disable the audio driver for the faulty audio device.
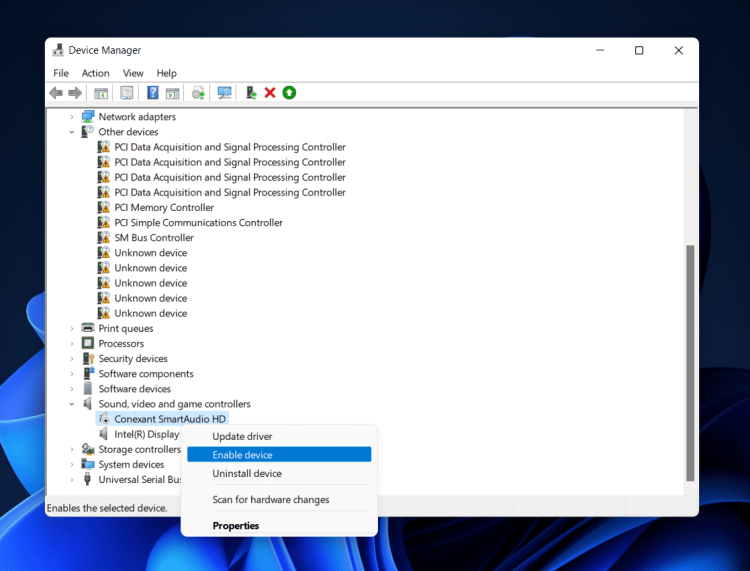
5 – After a few seconds, right-click the audio driver and click Enable device from the menu that opens up.
Re-Install Audio Driver
Re-installing the Audio Driver is another option to fix the issue you’ve been facing. Follow these steps to re-install Audio Driver.
1 – Choose Device Manager from the menu after pressing the Windows + X key combination.
2 – Double-click the Device Manager to open it and expand the Sound, Video, and Game Controllers section.
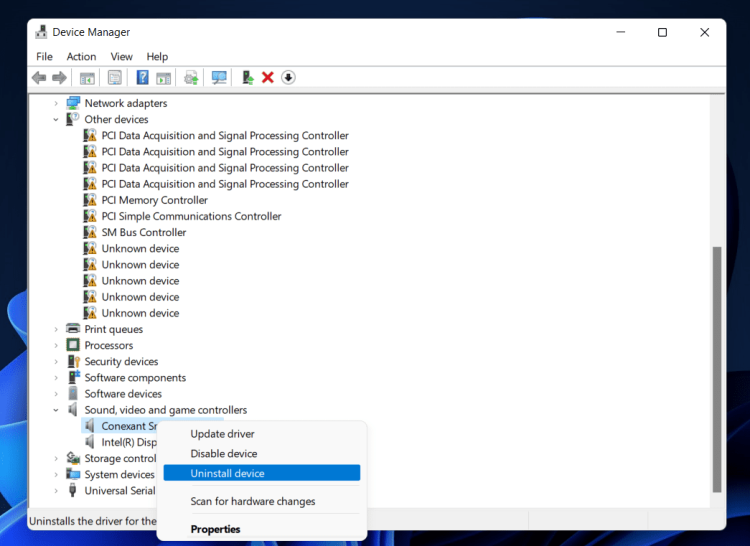
3 – Choose the audio device that is causing problems. Then, right-click the device and choose Uninstall device. When prompted to confirm the removal of the audio device, click the Uninstall button.
4 – Restart your PC after removing the device; the issue should be fixed.
Update BIOS
If you continue to get YouTube Audio Renderer Errors on your Windows PC, consider upgrading your BIOS. To learn how to update your BIOS and fix the issue you’ve been facing, see the manual for your motherboard.
Conclusion:
When attempting to stream content on YouTube on your Windows PC, a frequent issue known as YouTube Audio Renderer Error is one that many users have lately reported facing. This article will help you solve the issue if you face it on your PC. You will fix the problem you have been facing by following the abovementioned steps.


