One of the many wonderful features of an iOS device is Live Photos. And, much like the Camera app, devices running iOS 15 or later can capture Live Photos while on a FaceTime call. However, several customers report that Live Photos are not saving on a FaceTime call. The issue is certainly software-related if you haven’t tampered with your phone or attempted an illegal repair.
Though there aren’t many things that may affect its capability on your device, the typical suspects are a privacy-settings issue, old system software, or FaceTime issues. If you are facing a similar issue on your device, this guide will resolve it quickly. Since some of the fixes on the list include all of the FaceTime call participants, it is critical that everyone makes that all of the settings on their devices are appropriately calibrated.
FaceTime Live Photos Not Saving Issue On iPhone And iPad? How To Fix
Ensure All The Participants Are On A Supported Software System
Well, to click and save Live Photos on your device, ensure that all participants’ devices are running the supported iOS and iPadOS versions. All participants must have iOS 12.1.4 or later or iPad OS to save FaceTime Live photos. If you are unsure which iOS version you use, follow the instructions below to check and update your Apple device to the most recent software system.
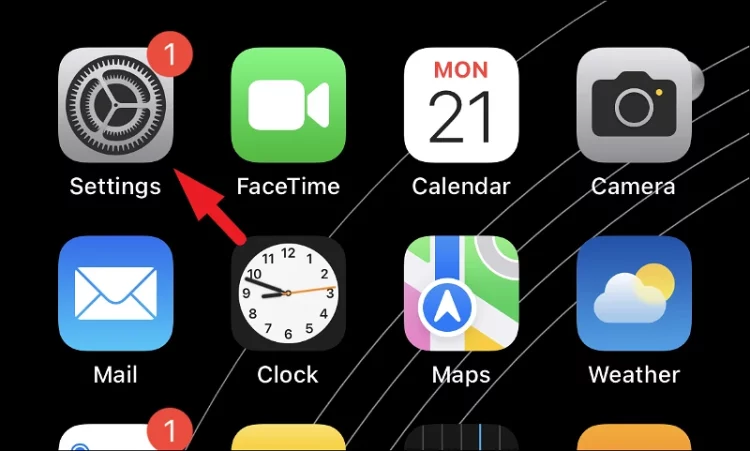
1 – Navigate to the Settings app from your device’s home screen or library.
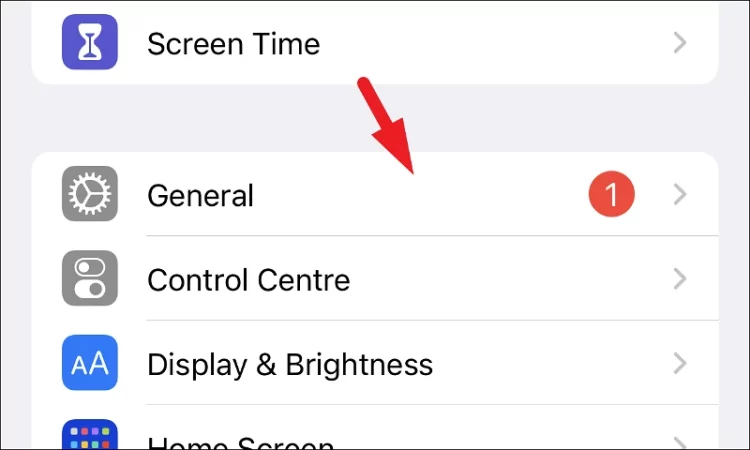
2 – From the ‘Settings’ screen, find and tap on the ‘General’ tile to proceed.
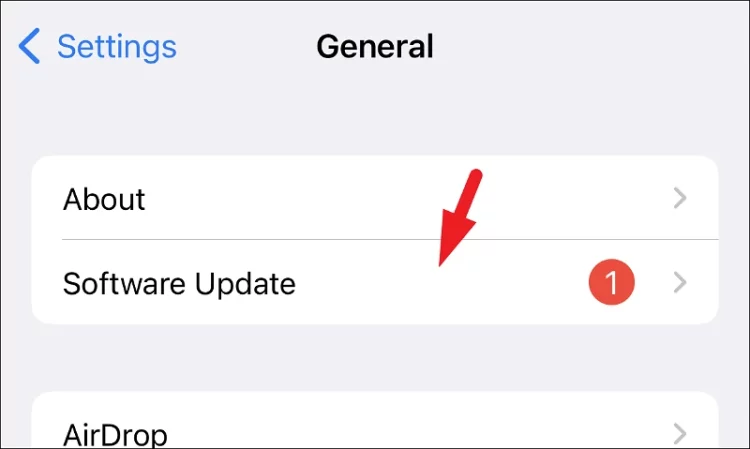
3 – Find and tap on the ‘Software Update’ tile from the ‘General’ settings screen.
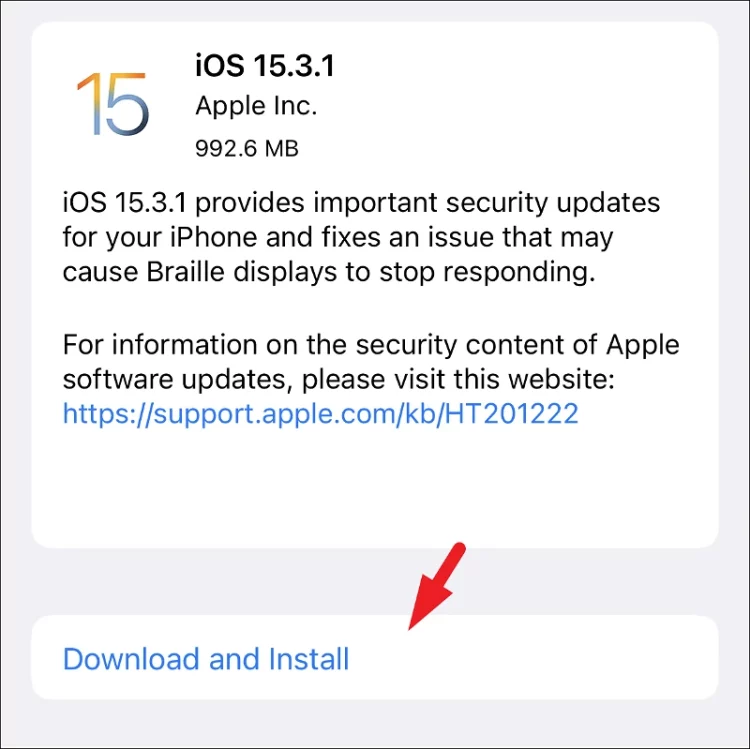
4 – On the next screen, allow your device to check for updates. If an update is available, tap the ‘Download and Install’ option to update your device to the most recent software.
Ensure All Participants Have FaceTime Live Photos Enabled
Because only some people want to capture or allow others to capture their Live Photos during a FaceTime call, this setting prevents other users from capturing a Live Photo during a FaceTime call. All participants should have FaceTime Live Photos enabled to save Live Photos on their devices. As a result, if the notification “FaceTime Photos must be enabled on both devices to use this feature” appears, one of the participants must check the settings and activate the feature on their particular device.
1 – Go to the Settings app on your iOS/iPadOS device, either from the home screen or the app library.
2 – On the Settings screen, scroll down and tap the ‘FaceTime’ tile from the list to locate.
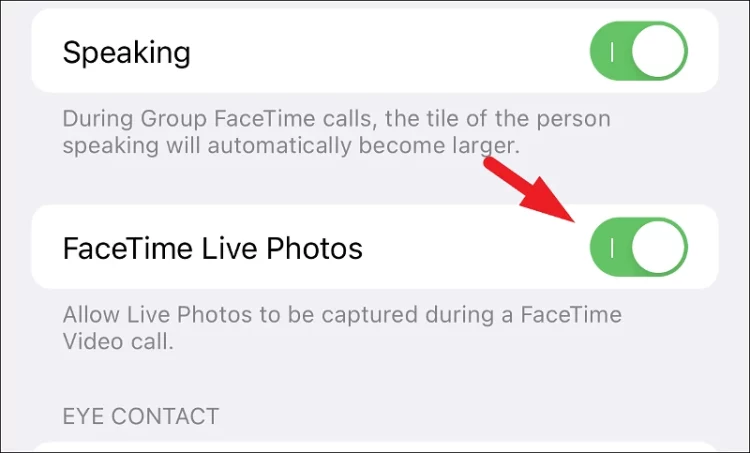
3 – On the ‘FaceTime’ settings screen, find the ‘FaceTime Live Photos’ option and, if not already enabled, tap on the toggle button on the far right side of the tile to bring it to the ‘On’ position.
Check Content & Privacy Restrictions
It’s also possible that FaceTime and/or the Camera app are disabled under your iPhone’s ‘Content & Privacy restriction’ settings, which might explain why you can’t shoot Live Photos in FaceTime.
1 – To check the current limits, go to the ‘Settings’ app on your iPhone, either from the home screen or through the app library.
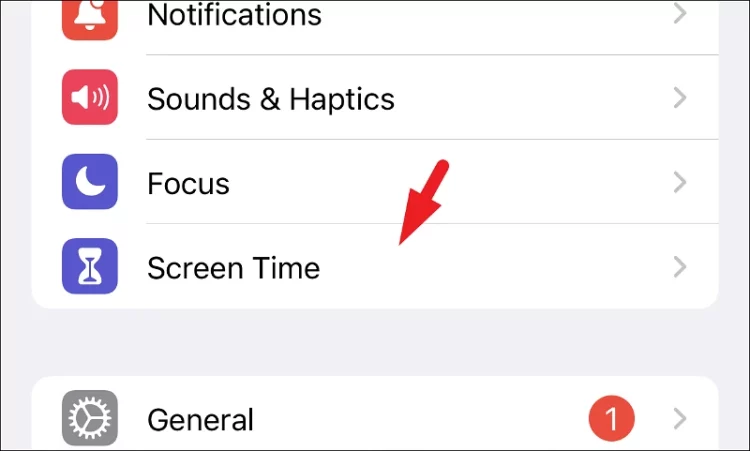
2 – From the ‘Settings’ screen, locate and tap the ‘Screen Time’ tile from the list to proceed.
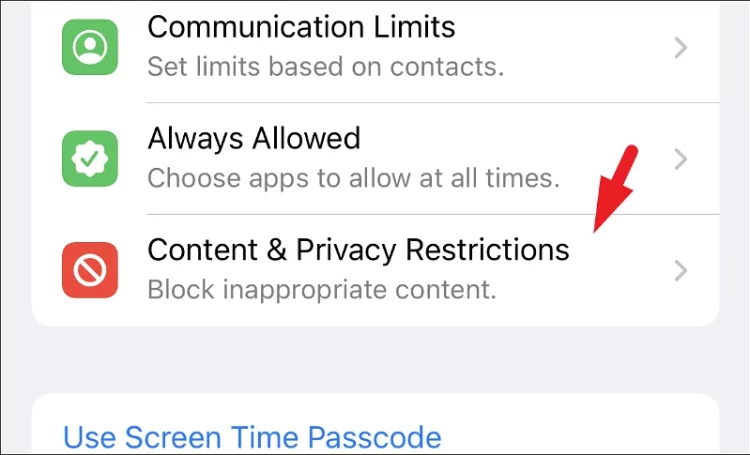
3 – Locate and tap on the ‘Content & Privacy’ Restrictions tab on the ‘Page Time’ settings screen.
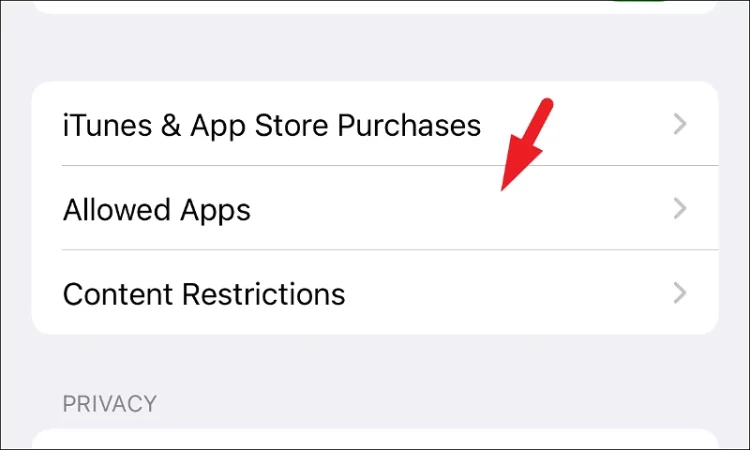
4 – From the list of options on the following screen, choose the ‘Allowed Apps’ tile.
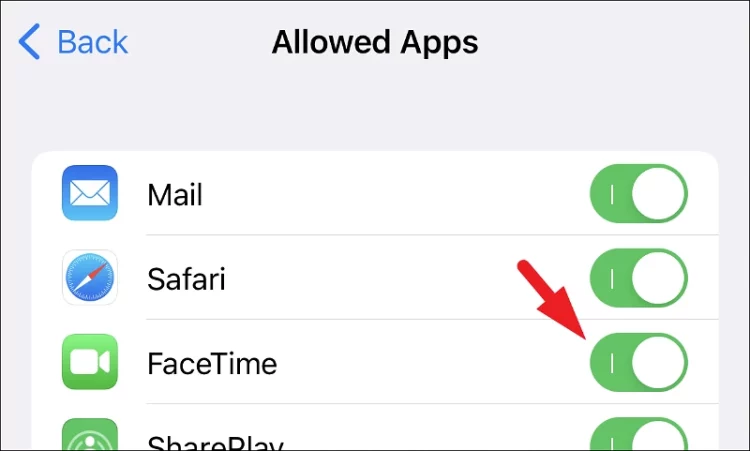
5 – Next, locate the ‘FaceTime’ option from the list and tap the following toggle switch to bring it if it is not already enabled.
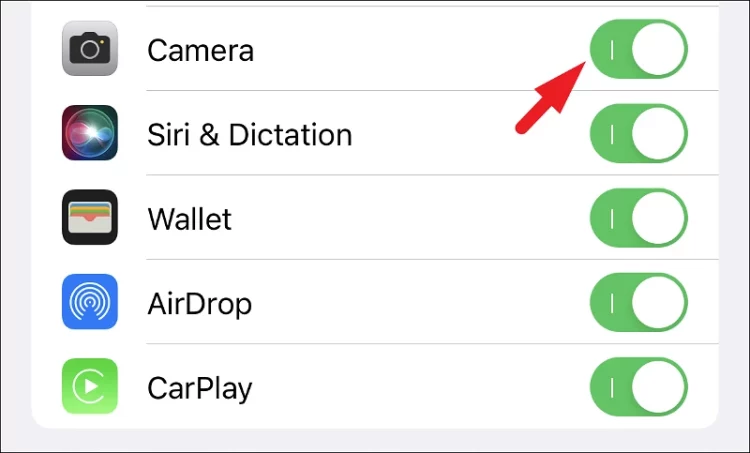
6 – Next, locate the ‘Camera’ option in the list and, like the previous step, turn the following toggle switch to the ‘On’ position to grant it access.
Force Restart Device
Restarting the device is a simple process, but when it comes to unexplained issues, it is a wonderful quick fix to the solution since it allows the device to shut down all systems and restart them. Unfortunately, because iPhones come in several versions, the process for forcing a restart varies. As a result, the procedures for each are listed individually.
Force Restart iPhone with Face ID, iPhone 8, and SE (2nd Gen)
Unlike past iPhone releases, the most current iPhones feature a new process for forcing a restart.
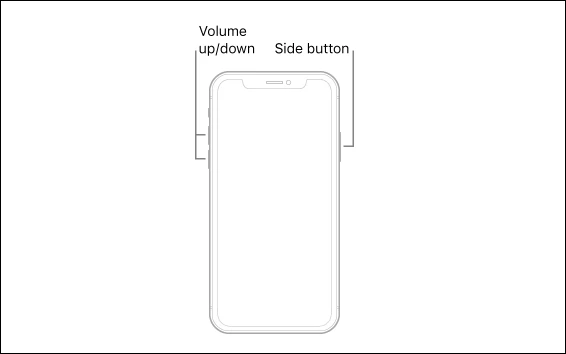
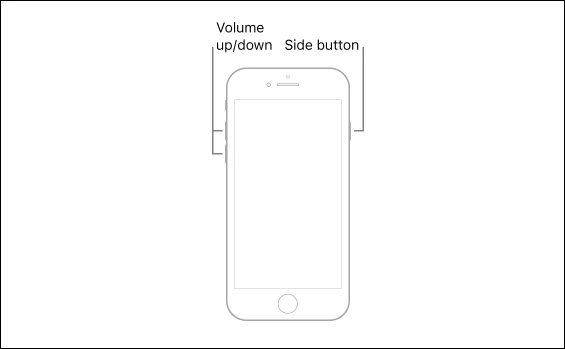
To forcibly restart the iPhones mentioned above, press and release the ‘Volume up’ button on the left side of your iPhone fast. Next, press and release the ‘Volume down’ button fast. Then, press and hold the ‘Lock/Side’ button until the Apple logo displays on your screen. Press the side button once the logo is displayed.
After restarting your iPhone, check your passcode to see whether the issue has been resolved.
Force Restart iPhone 7
This generation of iPhone is treated differently since it is the only one that does not share the process of forcibly restarting the phone with any other generation of iPhone. However, restarting an iPhone 7 is as straightforward as restarting any previous model of an iPhone.
Force Restart iPhone 6, 6s, and SE (1st Gen)
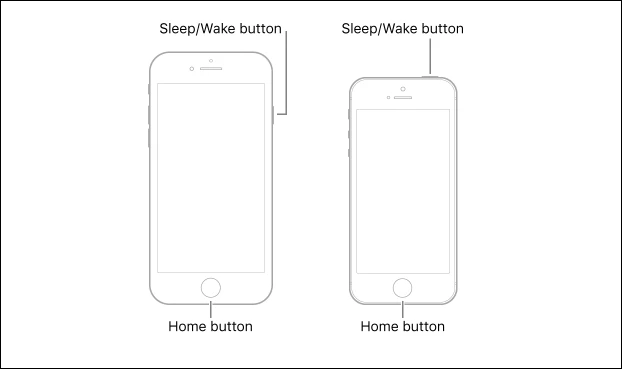
These last ones need the ‘Home’ button to force restart. Using the ‘Home’ button to restart the iPhone forcibly just makes the situation. To do so, press the ‘Lock/Side’ and ‘Home’ buttons on your iPhone until the Apple logo displays. Release both presses once you see the logo on your screen.
Disable And Re-enable iCloud Photos
If restarting your device does not resolve the issue, disabling and re-enabling iCloud Photos may do the job.
1 – Go to the ‘Settings’ app on your iPhone, either from the home screen or the app library.
2 – On the ‘Settings’ screen, scroll down to locate and tap on the ‘Photos’ tile to continue.
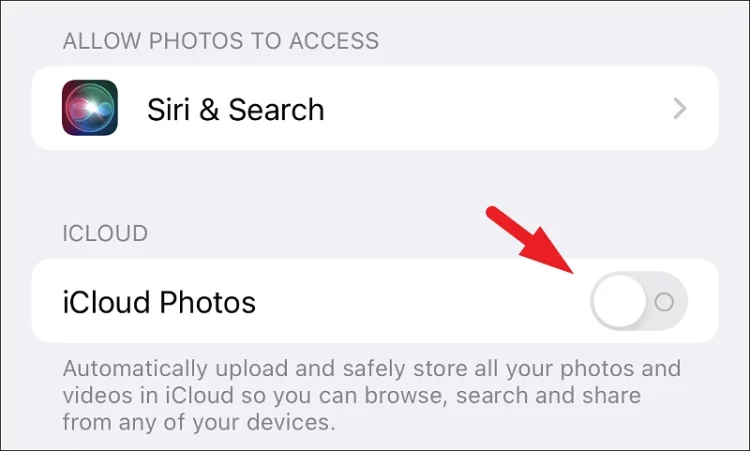
3 – Next, on the ‘Photos’ settings screen, tap on the toggle switch located on the far-right side of the ‘iCloud Photos’ tile to bring it to the ‘Off’ position, which is located under the ‘iCloud’ section.
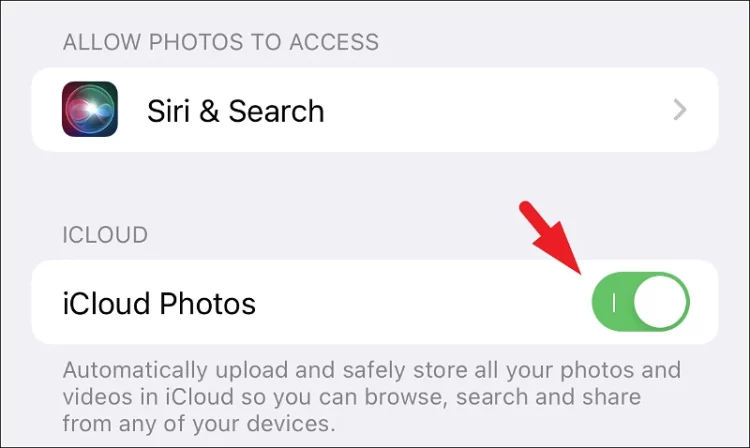
4 – After a few moments, tap the toggle switch again to turn it to the ‘On’ position.
5 – After you’ve enabled it, check to see whether the issue has been resolved on your device.
Disable And Re-enable FaceTime On iPhone
If nothing else has worked in your favor, it is time to bring out the major guns. Disabling and re-enabling it will function for you.
1 – To disable FaceTime, go to the ‘Settings’ app on your iPhone, either from the home screen or through the app library.
2 – To continue, scroll down to locate and tap on the ‘FaceTime’ tile on the ‘Settings’ screen.
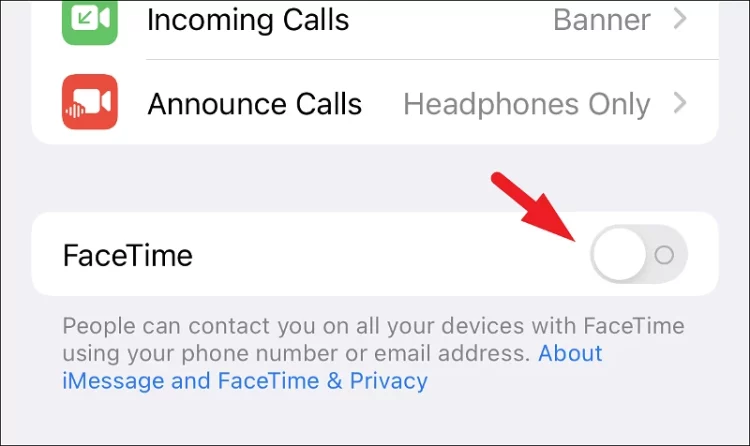
3 – Next, locate the ‘FaceTime’ tile and tap on the toggle switch on the far-right side of the tile to bring it off.
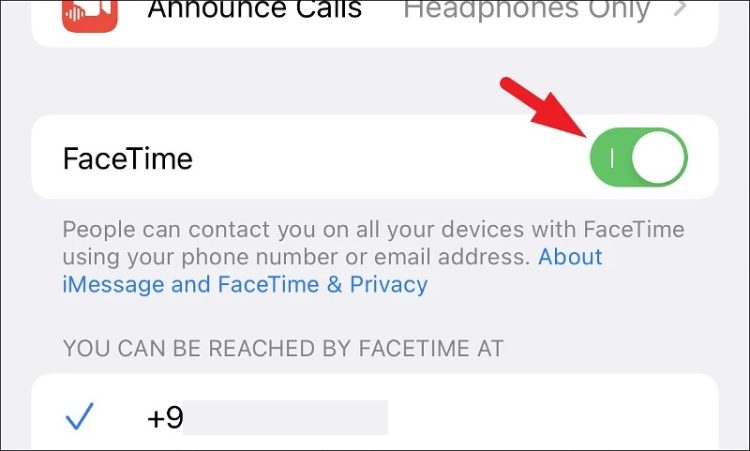
4 – After turning it off, wait a few minutes before tapping the toggle switch to return it to the ‘On’ position.
5 – Once turned on, check to see whether the Live Photos issue on your iPhone has been resolved.
Conclusion:
There you have it, guys. This guide can resolve FaceTime Live Photos not saving issues on your iPhone And iPad.
