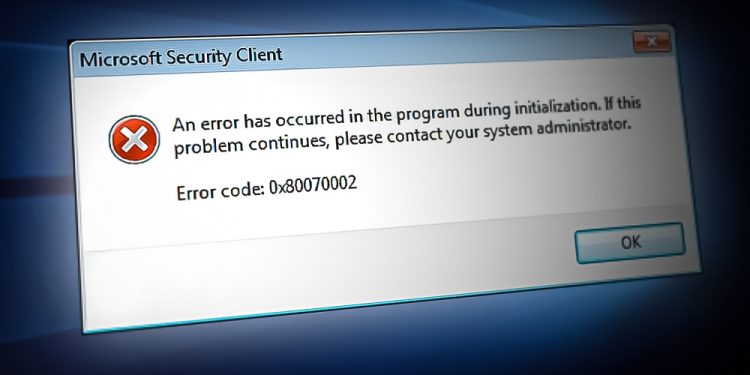
Many users have encountered Error 0x80070002 after installing the most recent Windows 10 system and security updates. Windows 7 users are also facing the same issue. When compared to other update errors, windows update 0x80070002 is a frequent and simple to solve the error. The issue is prevalent if you use Windows 10 Update Assistant to download and install new updates. Windows 10 Update Assistant enables users to install every pending update automatically; however, it sometimes generates errors such as 0x80070002, and the system cannot find the given file. Not only Windows 10 but also Windows 7 users are facing the same issue.
0x80070002 Error Code Cause
This Windows update error is caused by a faulty system update or a corrupted app installed on your computer. In the update, some users reported that their antivirus service prevents Windows 10 from updating. The same reason causes the 0x80070057 and 0x80070005 error codes. This error may be caused by a missing or malformed registry file. Other causes of this error include an incomplete Windows installation or a halted Windows update service.
0x80070002 Error Code In Windows 10? How To Fix
This post will fix you in resolving the 0x80070002 Windows 10 update error.
Check For Pending Restarts In Start Menu
You must restart your system after installing each Windows update so that your system can adjust to the changes brought about by the new update. If there is a pending restart, this might result in errors like this. When Windows Update discovers issues with the most recent updates, it will display an error message, and you will be unable to continue the installation process. So, before you attempt any solution, restart your system when you get the 0x80070002 error code.
Check Date And Time Settings
If the time on your computer needs to be corrected, you may get errors like this because Windows 10 needs the right time to download and install new updates. This may seem to be an odd solution, yet it works for many users. First, check your system time to ensure it syncs with the internet time. Using the command prompt, you may set the right time and date. Follow the following steps.
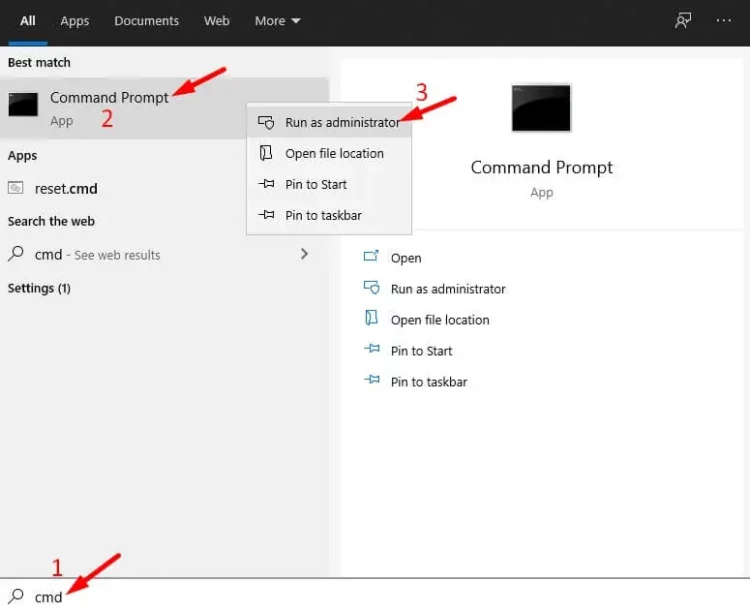
1 – In the start menu, type cmd > right-click on Command Prompt and choose Run as Administrator.
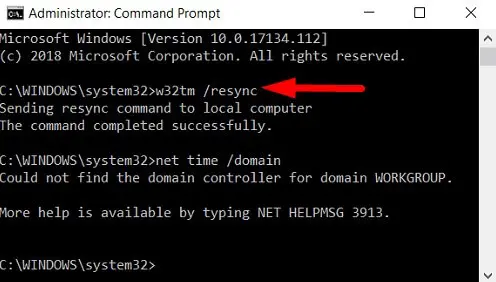
2 – Now execute these instructions, pressing enter after each one.
time
date
w32tm/resync
net time /domain
3 – If the time is still inaccurate, follow the next technique listed below.
Many users face errors while using the command prompt to change the date and time. In this situation, you may follow the manual route.
Set Time And Timezone Manually
Here are the steps to manually change the time and date in Windows 10.
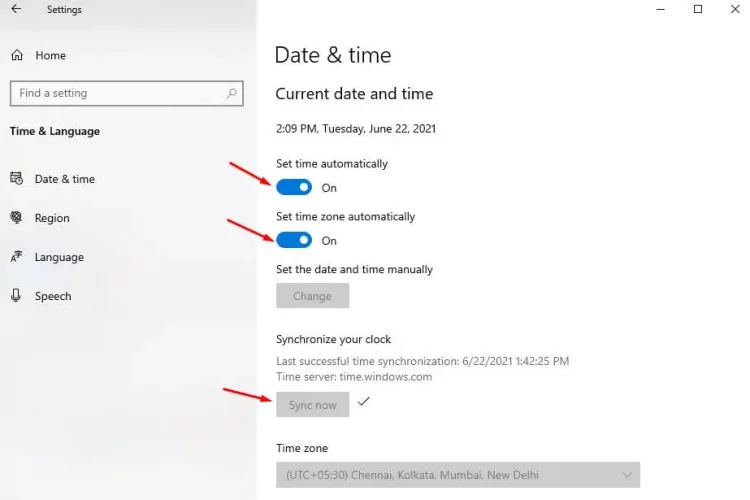
1 – In the taskbar, right-click on the time widget and choose change date/time.
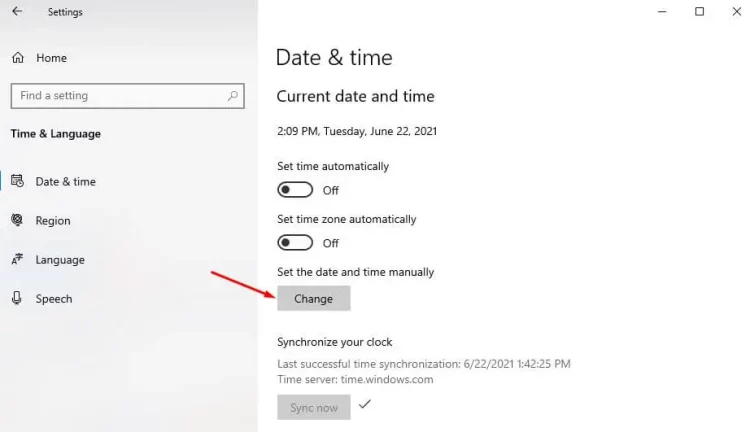
2 – Make certain the “Set time automatically” and “Set timezone automatically” options are turned on. This will synchronize your timezone and time with the timezone and time on the internet.
3 – Click the Sync button to synchronize your clock with the rest of the globe.
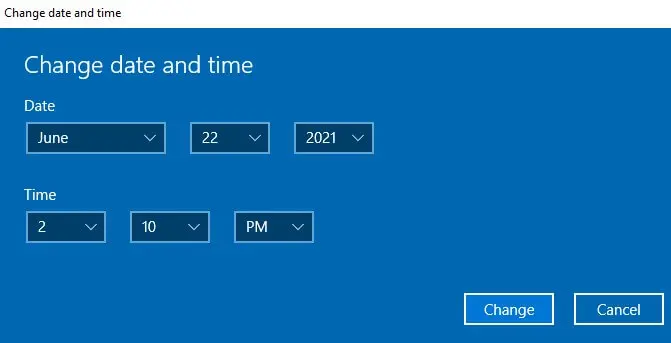
4 – If automatic synchronization does not work, you may manually set your time and timezone. Click the set time manually.
5 – Enter the current date and time. Then save your settings.
6 – Restart your computer and attempt installing new updates.
Use Windows Update Troubleshooter
The second step in fixing Windows Update error 0x80070002 is to run a Windows update troubleshooter on your complete system. Windows Troubleshooter is a built-in tool from Microsoft that may be used to fix issues with Windows updates, printers, and networks. The tool is sophisticated and can resolve issues such as error code 0x80070002, blue screen of death, DNS error, etc. A Windows Update troubleshooter is a tool meant to assist you in resolving some of the most typical problems that arise while updating Windows. There is no need to download anything since it is included with Windows 10. Instead, follow these steps to use Windows Troubleshooter.
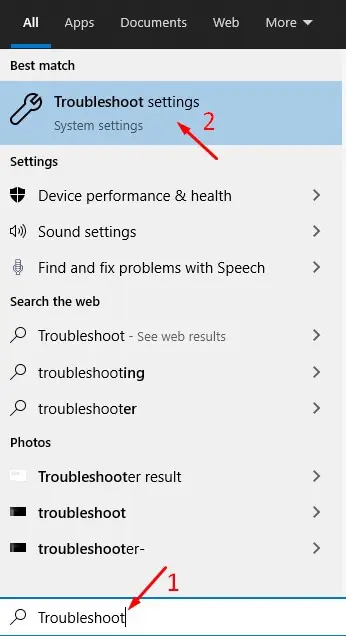
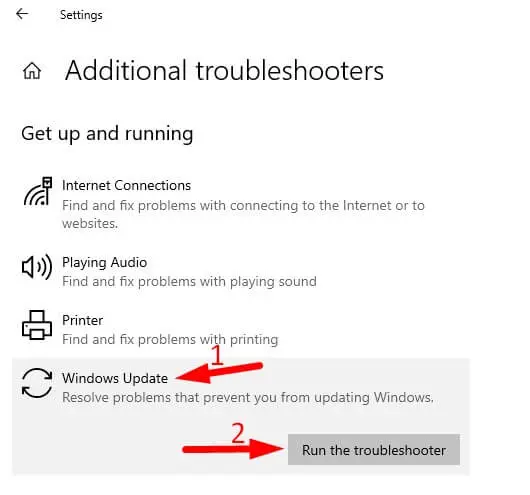
1 – Look for the troubleshooter in the start menu and click “Troubleshoot Setting.”
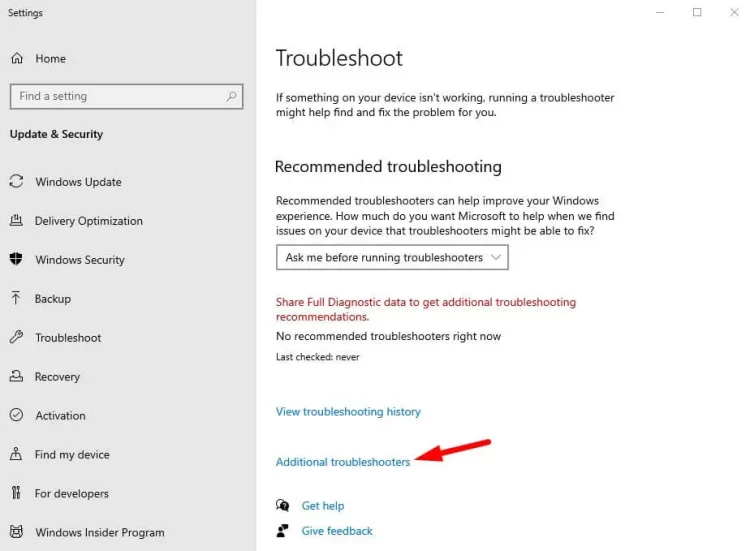
2 – Click “Additional troubleshooter” to access advanced troubleshooting options.
3 – In the Getup and running section, click Windows Update and Run the troubleshooter.
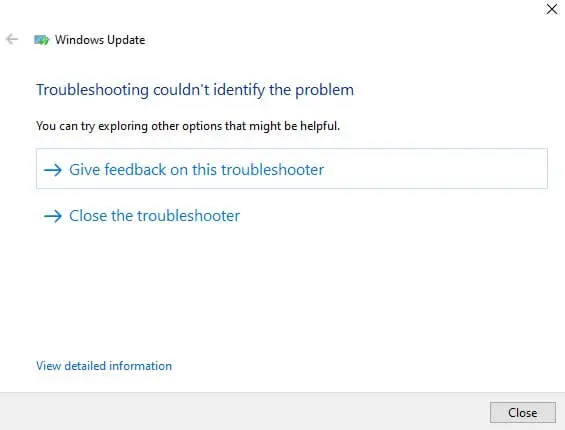
4 – It will begin examining your system for any unfinished restarts or missing files. After you start the scanning process, it will show a list of errors that it has discovered. If it cannot find the problem, it will go to the next solution.
5 – To fix the issue, follow the steps outlined in the result.
6 – Restart your computer after you have corrected all of the errors. This will refresh the system memory and temporary files. Then attempt to install any new updates. It should now work.
Set Windows Update To Automatic
Allowing your computer to download updates automatically through the Windows Update service is the easiest approach to prevent having Windows Update. This ensures that Windows only installs updates from the appropriate sources. Using Windows services, you may activate automatic updates. The steps are as follows.
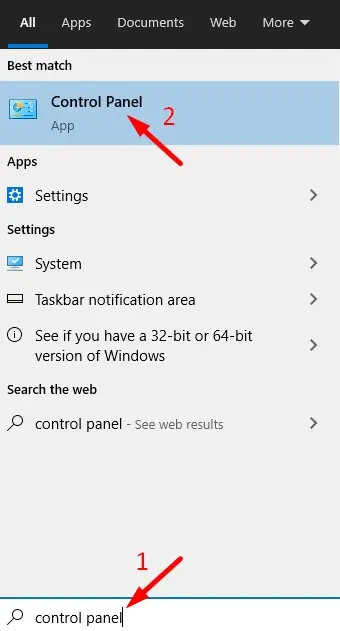
1 – Go to the start menu and look for the control panel.
2 – To open the control panel, click it.
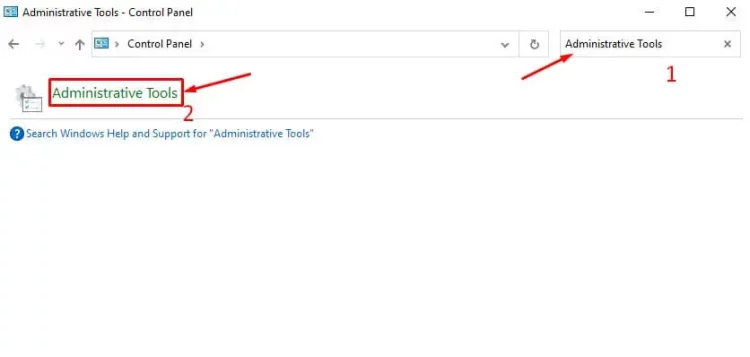
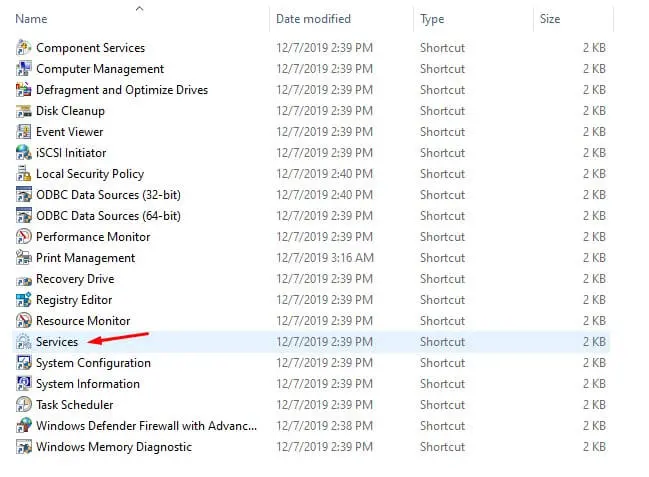
3 – In the control panel, type “Administrative Tools” into the search field.
4 – Find and open Services.
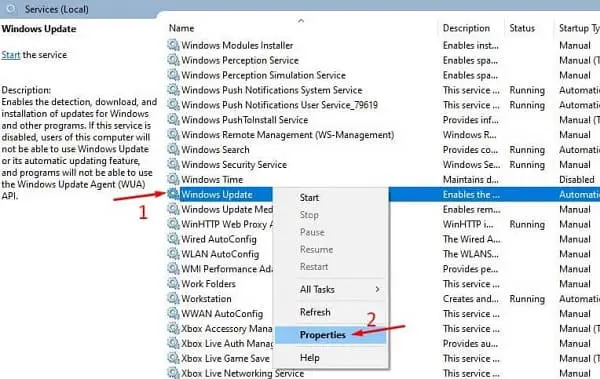
5 – Locate the “Windows Update service” in the list of Windows services.
6 – Right-click it and choose Properties.
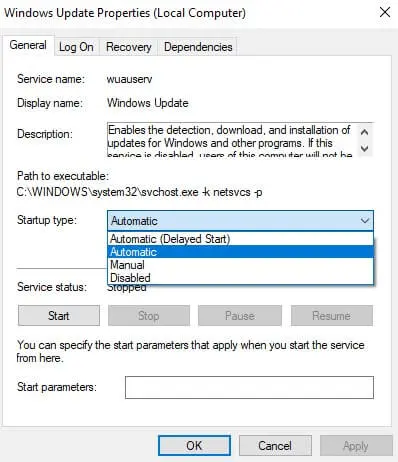
7 – Change the startup type to “Automatic” and then Apply changes.
Your system will automatically check for new updates and install them whenever they become available.
Restart Windows Update Service
You may fix this issue by restarting Windows update services. Restarting the update service will refresh the Windows update package and resolve any network issues. Follow the following steps.
1 – Follow the same steps as in method three until step 6.
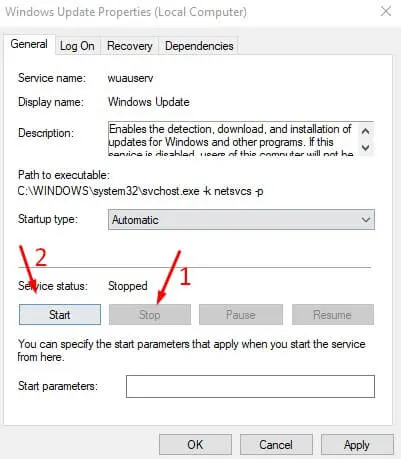
2 – Click the Stop option to terminate the Windows update service in the properties window. This will terminate your Windows update and any associated services.
3 – Click the start button once again to restart the update service.
4 – Click Apply to preserve your changes.
Restarting the update service will fix the 0x80070002 error on Windows 10.
Delete Software Distribution Folder
The Software Distribution Folder is used to store Windows update files temporarily and is needed by the Windows Update service to download new updates. Deleting the Software Distribution Folder will refresh updated files and fix the problem.
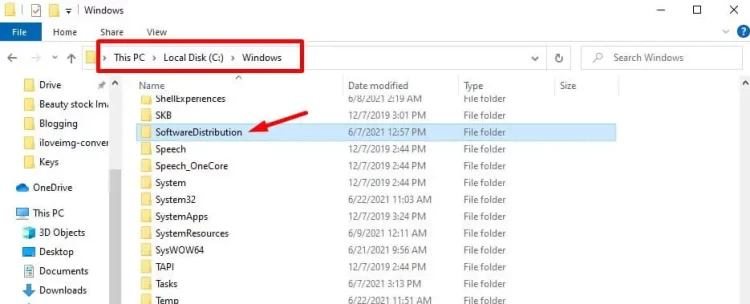
1 – Navigate to your system installation drive. It’s a C drive, in my instance.
2 – Now go to the Windows directory, followed by SoftwareDistribution.
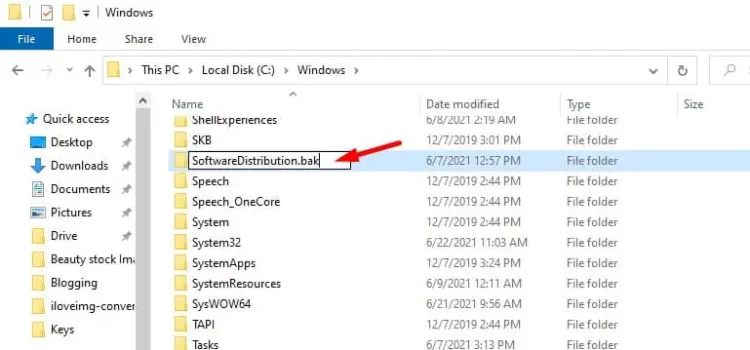
3 – Now, pick and delete the folder. If prompted, enter the administrator password. You may rename the folder if you don’t want to delete it. Renaming the folder will have the same effect.
4 – Restart the computer and check for Windows updates.
Modify Registry
Changing the Windows registry file may fix the issue. To modify the registry, ensure you are signed in as an administrator.
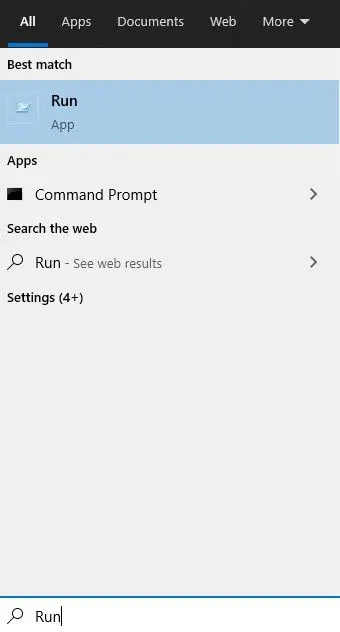
1 – Open the Start menu and search for “Run,” or use the Win + R keyboard shortcut to open the Run utility tool.
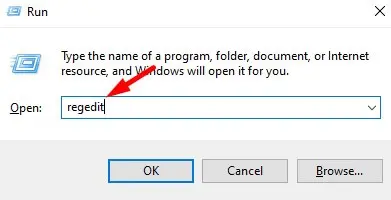
2 – Type “regedit” into the Run command box and hit Enter. Well, this command will open the Windows registry editor.
3 – Go to this spot now.
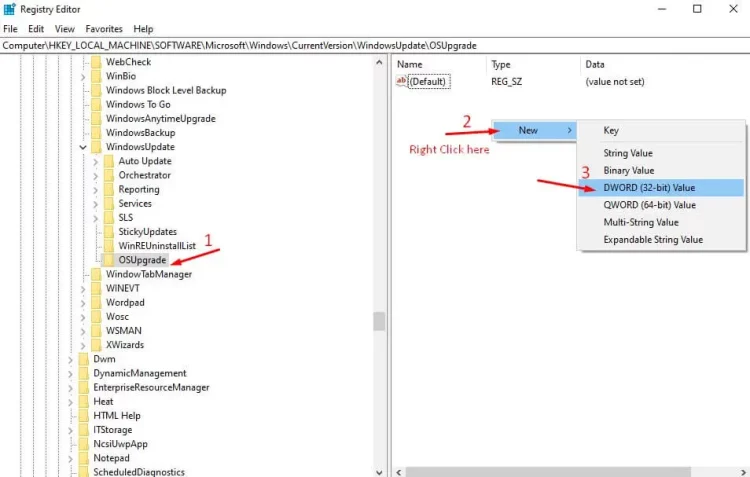
HKEY_LOCAL_MACHINE\SOFTWARE\Microsoft\Windows\CurrentVersion\WindowsUpdate\OSUpgrade
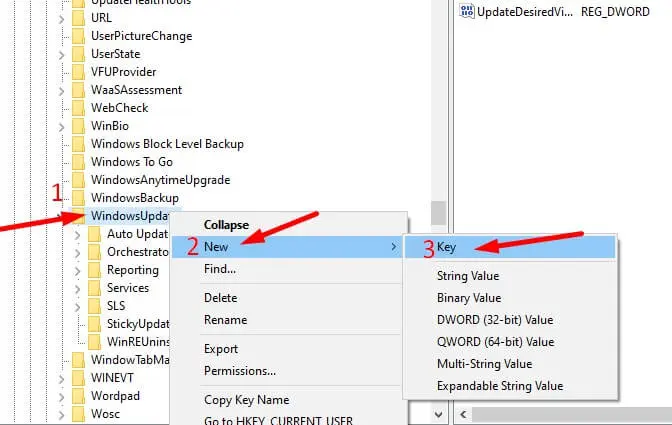
(If you can’t find the OSUpgrade key, make one. Right-click on WindowsUdpate > New > Key, and then rename it to OSUpgrade)
4 – Select the OSUpgrade key > right-click in the blank space on the right size > New > DWORD (32-bit) Value > AllowOSUpgrade.
5 – Right-click on the newly generated value again and choose Modify.
6 – Double-click the number to change its value from 0 to 1.
7 – Click OK after selecting Hexadecimal.
8 – Restart the computer to apply the modifications take effect.
The Bottom Line:
We trust the error has been fixed. However, you may use the system restore option if you still receive the 0x80070002 error code after using the solutions listed above. It will restore all of your system settings and fix the issue. You may also reset Windows 10. If you need any assistance with this issue, please leave a comment below.
